Showing posts with label Crafts. Show all posts

Friday, April 18, 2014

A Birthday Birdhouse


So back in February of '13, I posted a "tease" of a new birdhouse craft I was working on. I honestly thought I'd have it done well before now, but as things go sometimes, time got away from me.... 

I finally got around to putting sand on the base and getting the big shells on in September of last year.


 And then I filled in the white spaces with the smaller shells (and a load of hot glue - I only burnt myself a few dozen times).


And then It was a matter of cutting and affixing the net to the roof and applying the starfish and "chimney" shell.

Tuesday, July 2, 2013

Set in metal

I'm working on a project. Part of it is pictured above. It involves writing in silver sharpie on a black background. And as I work in it, I can't help but think of the inscription Sazed finds in chapter 12 of The Well of Ascension at the Conventical of Seran:

I write these words in steel, for anything not set in metal cannot be trusted.

Of course, I'm not etching anything into a plate of steel, and it's certainly not as important as what went down in that book, but it definitely has me thinking. 

Tuesday, March 26, 2013

Bath Fizzies

So, I made bath fizzies for the first time a little while ago. (From this how-to off Pinterest)
They turned out... interesting.
They did not turn out as purple as I hoped.
And because I want them to smell pretty, I got this.  Any Guesses?
It's not a jewelery case. Though it totally looks like one. It's my new set of essential oils, and I do really love that they look like they're in  a jewelry case.


Friday, March 1, 2013

2013 Goal Updates: March


As I sat down to write out this progress report, I realized something. I didn’t remember what all of my goals for February were. And even not knowing them (or perhaps because I didn’t know them) I knew I had not managed to get through them all.

2013 Goals Update:

 
One Craft Project per Month
I got this one done half way through the month. I kind of feel like that was a miracle… but at the same time I know it wasn’t. I started it in January for reasons stated in the post about it and so I was able to get through it relatively easily :)


Review 4 Movies and  1 Seson of TV per Month
Well, once again I got the movies done, but failed miserably on the TV part. I’m going to have to do better with that one, methinks.


Read 60 Books (5/month)
This one I passed… I read 11 books this month. I bounced around in a few genres, and certainly had a gamut of ages to those books. But the important part is that I enjoyed them all! (they're linked if I reviewed them)

The Governess Affair (Brothers Sinister) by Courtney Milan
Japanese Fairy world – Stories from the Wonder-Lore of Japan by William Elliot Griffis
The Duchess War (Brothers Sinister) by Courtney Milan
A Kiss for Midwinter (Brother’s Sinister) by Courtney Milan
Beautiful Creatures (Caster Chronicles) by Kami Garcia and Margaret Stohl

February’s Goal: Get the apartment completely and totally organized and up to snuff.
Yeah, this didn’t happen. I have a list of things to do to make it happen, and I think I’ll get closer this month.

March’s Goal: Get back into the swing of knitting!
(I learned how to knit in the fifth grade, and while I’ve since then not knit in over a decade – excluding the two rows I did when I bought a set of needles in January – I’ve found that its actually not that difficult to get back to! At least… I’m hoping not.)

Tuesday, February 19, 2013

Quick craft: Warm/Cool Pads

This weekend, I pulled out my sewing machine, and while I was worried I'd somehow forgotten the basics, after nearly eight years, I managed to not kill my fingers with the needle. Also, I'd forgotten how much I love spinning bobbins. Weird, I know.

Anyway, as my quick "remember what you're doing"  project I pulled some scrap fabric out and made a pair of heating/cooling pads.

They're super simple, if all you want is a small  pillow like version (which works best for what I intended to use them for: my knee.)

Step 1: Line up your fabric.
     Best to have 2 layers of fabric imo
Step 2: Sew
     Leaving a hole through which to pour your rice, swe up three sides completely and most of the fourth.
Step 3: Invert
     Pulling the pouch you've made through the hole so your innards are where they're supposed to be.
Step 4: Fill with Rice
     I used a rolled up paper tube to get the rice in, but if you have a funnel, that would work better.
Step 5: Sew up Filling Hole
     Hand stitch up the hole and you're done.

Then all you need is a quick 30 seconds- to one minute in the microwave, or 15 minutes in the freezer and you're good to go!

***I'm kind of in love with how (when combined) my scrap fabric totally looks like the pile's from the seventies. Though, to be fair, the brown, peach and gold paisley was left over from a costume I made for the Jazz Choir's Abba Medelly in High School.***

Friday, February 15, 2013

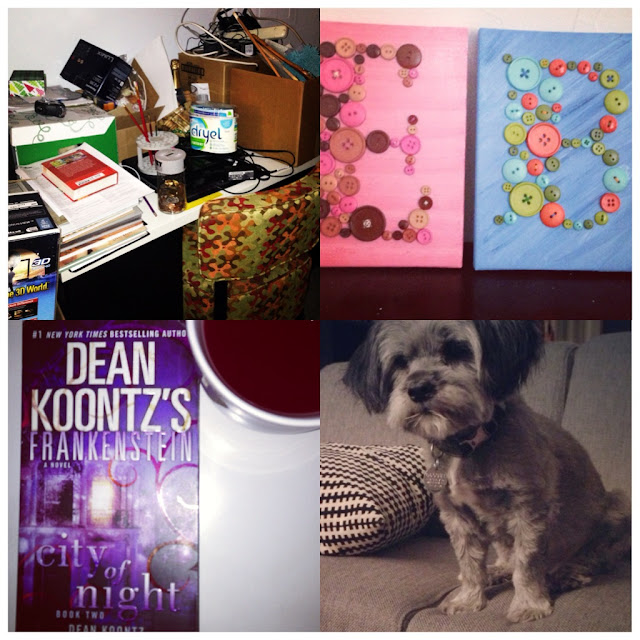
February's Craft: Button Monograms


Once again this particular craft was inspired by Pinterest... who woulda thought? The link to that is right here.

I changed it up a little and here's how you can do it too.


What you will need:
Canvas
Paint and paint brush
Buttons
Glue
Embroidery Floss, A needle, and scissors

Step 1: Paint your canvas and let dry fully.

I wanted the pink one's textrue to resemble cake frosting. and thankfully, I managed to get just that!

As you can see, I started this craft back in January (note the unfinished cork birdhouse). But that is because I was using oil paints and if you know oil paints, you know they take a while to dry.

For the Blue I went with a technique I've used a lot in the past, but stil love. (I painted this one the weekend ater the pink, to allow for ample setting time before I hung the pink up to finish drying.)

And there it is, drying over my abysmally disorganized desk.

2. Lay out your letter (or if you want to do a different design, that's cool too) and glue buttons in place.

It was like a strange sort of puzzle.

The first attempt at a layout for the B did not work at all. It's got button issues as well as being too far down.
The glue is important if - like me you don't plan to sew all of the buttons on.

Step 3 - Sew buttons on. (You can do a little or a lottle, or all.) I did a few here and there.

I'm not sure why this ended up being so grainy.

Tuesday, February 5, 2013

Quick Craft: Skull Salt and Pepper Shakers

Ever heard of Chrystal Skull Vodka? It's the vodka that comes in a (Glass) Skull and let's face it, you buy that vodka for the novelty of it.

And when I realized my salt and pepper shakers were not cutting it anymore I went on a search for new ones, and sure, I could have bought the Dr. Who ones from ThinkGeek. Or any other number... but why are they so expensive?

And then, we were in Total wine and I saw that Crystal Skull Vodka had the mini "Gift Size" bottles (lets face it, if you're gifting me with booze, I'd like an adult sized bottle). And I thought! I can make that into a salt and pepper set.

So I bought two... for a WHOPPING $8 each. Which, $16 is actually not that bad for a set.

Here's how you make your own.

1. Buy Vodka
2. Drink Vodka (you knew this was the craft post to read!)
3. Clean and dry vodka bottles
4. Remove inner protector on cap, punch holes with a Nail.
5. Fill one with salt, the other with pepper.
DONE!


Sunday, February 3, 2013

Craft Tease

I bought another birdhouse...

And I have different plans for it (I even painted it white first), but I'm not going to tell you what they are until it's done!

And there's a little peek at the first of the two parts of February's craft ;) it's pink.....

Friday, February 1, 2013

2013 Goals Update:

365 recipes
I will admit. This did not get done. In hindsight it was not the best of ideas, and I think I’m going to scrap it in favor of something else. The recipes are just too unhealthy to really sustain eating them with any normalcy. Instead, I’m working on a different eating plan – one that’s easy on my waistline and I’m more likely to sustain!

One Craft Project per Month
I managed to get this one in just under the line. In fact, the glue is probably still drying! But I did start my February craft already and I’ve started re-teaching myself to knit (albeit slowly)

January - Cork Birdhouse

Review 4 Movies and 1 season of TV per Month
This goal was  almost met this month with a little extra on top of the movies category.

I didn't finish Season 1 of Agatha Christie’s Marple (but I'm darn close!)


Read 60 Books (5/month)
I got through my prescribed five novels in… a week and a half early, with one extra on top of that. And read a few more before January closed out. (Don’t forget, you can always follow along on Goodreads!)

When you Give a Duke a Diamond by Shala Galen
Hourglass by Myra McEntire (Review will be up 2/5/13)
The Hitchhiker’s Guide to the Galaxy by Douglas Adams (Review will be up 2/7/13)
and Light Weaver by Thomas Locke (This one is getting a series review a little later.)

January’s goal: Organize all my Pinterest boards
Success! The task, albeit a tedious one, almost proved therapeutic. We’ll see how long it takes before the mess builds up again!

February’s goal: Get the apartment completely and TOTALLY organized and up to snuff.

Thursday, January 31, 2013

January's Craft: Cork Birdhouse

So my plan to do one craft project a month is going okay…. I’m counting this one finished though the glue is still drying.

This month I made a cork birdhouse. And I’m going to tell you how to too!

Fair warning... this takes a bit of time.


What you’ll need:
A birdhouse (You can build one yourself, or you can take the easy way out like I did.)
Corks! (Drink a lot of wine!!! Okay, so we had most of these in an old school leaded glass ice “bucket” and most of them are from Lambic beer.)
Wood Glue
Cutting implement and cutting surface (I used an exacto knife and a scrap piece of cardboard.)
(A nail is optional for securing the chimney – I felt better with the finishing nail holding it up.)

Step One: Halve A bunch of your corks! 
Flat surfaces will work best, so the flat half of the cork will adhere

Step Two: Pick a side and Arrange!

 I took pictures each time so I'd remember how they went back on (this is before the glue) but you get the idea. Make sure it fits!

Step Three: Glue and let Dry!
Now that you've got your layout figured, get to gluing!
 REPEAT STEPS 2 & 3 FOR ALL FOUR SIDES!

 I set mine to dry in the window with the longest sunlight of the day. (Ignore the bowl of tea lights and eyes... I don't have time to explain right now)

Step 4: Shingle the roof and apply the Chimney!
I made roof shingles by taking the cork halves and cutting slivers from the length.
The Chimney is a champagne cork glued on  (you can still see the glue in the picture below) and then secured with a longish finishing nail!


Friday, January 11, 2013

Christmas Crafts: Bleach Shirts

One of the things I did this year for my Christmas Crafting was shirt bleaching. I've seen it on Pinterest over the past year or so, and I love the way the shirts turn out. SO I thought I’d give it the ol’ college try and decided my siblings would be the perfect Guinea Pigs :D

spent about three weeks plotting out what I was going to draw up – I used my paper app on my iPad to sketch out ideas.

In the end I came up with three simple, yet fun drawings and I decided they were the way to go. So I went in search of the perfect shirt (color and sleeve-wise) and picked up a bleach pen while I was at Target for other things… and then, it was a simple matter of drawing the design on and waiting….

The process is really simple, so I’m going to give you a quick “How To” and then get to showing you the pictures!

What you’ll need:
  • Shirt  (Made of natural fibers – synthetics are not going to take the color well)
  • Bleach Pen (I only saw Clorox, but I’m sure there’s another brand somewhere)
  • Cardboard to fit the size of your design
  • (Optional) Chalk, Aluminum Foil, cardboard stencils, and Latex Gloves (These come in VERY handy if you’re at all allergic to bleach like I am!)

How you do it:
1) Lay your shirt out on a flat surface and slide cardboard underneath. (Option: taping a layer of aluminum over the cardboard will let the bleach lines bleed more than with out – regular cardboard soaks up some of the bleach, aluminum keeps it on the shirt.)

1.5) Put on your Latex gloves at this point if you have sensitive skin!

2) Shake the bleach pen thoroughly! Draw out your design (Option: If you’re not sure about your lines, make a stencil and/or use chalk to do a mock up before you use the pen.)

3) Let the bleach sit on the shirt for 30 minutes or so – you’ll be able to see the color leeching from the shirt.

4) In your kitchen sink,  rinse off the bleach lines, they’ll be a little stiff, so you may have to rub them off.

5) Wash without detergent in a cycle all by itself. If you’re worried about the bleach after that, run it through a second cycle with detergent and then dry. (And then admire your handi-work!)
 
*** And now to the Pictures! ***

For my little sister, I chose a bright t-shirt and a whimsical Robot I’ve been drawing in one form or another for a long while. I think it’s adorable and fun, just like her!


The little brother’s design came from three different things: 1) his college mascot was the Vandals (basically a Viking)  2) He  now works at a college where the mascot is a Viking! and 3) he can grow a mad-scruffy beard. And thus the happy little Viking was created!
My older sister always reminds me of flowers, pretty, delicate and just plain nice, so I cut out some card board stencils and chalked out a bunch of flowers down the side of a shirt for her (and one on the sleeve, because I love that sort of detail on shirts of my own).


And here's what they look like after they've been set, washed and dried!

On the Purple one, please note that the sleeve is blending in to the shirt, but that one flower under the robot is actually on the top of the wrist.


Please note: the Viking shirt changed colors. You are not going crazy, I accidentally failed to look at the fabric notes on the tag of the last one.... and did not realize it was a synthetic until after it refused to change with the bleach!


A Close up of Zee Viking!


 And that, dear readiers, is the extend of my Shirt bleaching for the holiday season... I may make myself one or two in the coming weeks.... and then, you'll get more pictures :D

Have a great Day!

Thursday, January 10, 2013

Christmas Crafts: Seaside in an Apothecary Jar

Earl’s mother LOVES all things sea-related. Her living room is full of reminders of an ocean this land locked state won’t see unless an earthquake really does send California under the waves.

But Earl and I are both enablers. We have no problem giving in to this particular obsession, and as such, her Christmas presents tend to have a theme.

When we were in Vancouver staying with my aunt, I found in her living room this GIANT hurricane that was filled with a layer of sand, some shells and a ceramic light house and I thought: Earl’s mom would love this! So I decided, when we got home, I’d set about making something similar.

One trip to Michaels and we had this:

(Please excuse the mess!) I chose the Apothecary Jar because we live in a desert… such a life means that dust is EVERYWHERE. I kid you not, to keep on top of it, you need to dust almost daily. But, that being said: Apothecary Jar it was.

Basically the ingredients were as follows:
  • 1 Apothecary Jar (Large)
  • 2 bags Sand
  • 1 bag Assorted Shells
  • 1 Net
Put 'em to gether and what have you got? Bippity bopity boo!


I hot glued the netting over the lip of the jar and then secured it and a shell to the base of the jar
(Please note the ornament also pictured - it's simply two matching shells hot glued around an extra plastic ball ornament.)

I am very pleased with how it turned out!

Wednesday, January 9, 2013

Christmas Crafts: Origami Boxes For Tea!

I don't do much scrapbooking myself. I have nothing against the practice other than that it is such an expensive thing... But I love Scrapbook paper and the versatility it allows!

One of the best things about scrapbook paper is that it's square, like Oragami paper, so you can use it in much the same way. So when I needed to make some boxes to deliver tea to friends and family, I knew exactly what I was going to look for when I found myself in a craft store next!

I used this tutorial off Pinterest and simply took 1/4 inch off two sides of the bottom box's paper (keeping it square) so that they would fit together snugly.


They are perfect for wrapping up some of the little things I gave this year!

Tuesday, January 8, 2013

Christmas Crafts: Letter Ornaments and An Inspiration!

I saw these letter ornaments on Pinterest the other day and decided I would give them a go to send off to my family. I of course changed them up, because I can’t leave well enough alone….

What you'll need:
  • Wooden Letters
  • A Drill (and if you're me, someone to drill the hole for you! Thanks Earl!)
  • Spray Paint
  • White acrylic Paint
  • Paint brushes (1 fine tip, one medium)
  • Newspaper for spraying and to catch the drips
  • Yarn or ribbon to hang them from

Spray your letters and let them dry completely (on both sides)

 Then it's a matter of painting what you want on them. I went with a snow and snowflake design on the front.

This was the point at which I decided I wanted to make more ornaments.... but I didn't really have a reason. So I texted and emailed a few friends with an idea I had for an ornament exchange! I'm super excited about it.... but you won't hear about it again until next year, when the exchange is actually going to happen.

and then I did a Candy Cane Stripe on the back.

Once they're totally dry, thread the yarn/ribbon through and you have adorable new ornaments!

Wednesday, December 12, 2012

Christmas Crafting: Wreaths

So I can’t show you all of the things I’ve been doing for Christmas crafts…. because WHAT IF SOMEONE SEES THEIR GIFT? But I can show you the Ornament Wreaths I made, because I’ve already show the pictures to the second one’s intended recipient so she could take her pick.

So, I saw this on Pinterest and thought it was nifty and decided to go about making my own. Here’s the link to the original post I followed when making mine.


Firstly, the supplies:
Wire Coat Hanger (and a leatherman or something of the like to open the top and close it again when you’re done)
Ornaments (get molded plastic ones so you don’t have to waste time gluing the tops to the balls)
Ribbon or a bow (I started with grand designs and bought ribbon, went back later and got two tree bows instead)

Making these is super simple!

Step one: Bend your wire hanger (WITH THE HOOK STILL CONNECTED – if you untwist the top now, it’ll be difficult to get the thing actually round) into a circle, make sure it’s flat and not boxy, sharp angles will show up in the finished product. Untwist your hangar.

Step two: (at this point you need your ornaments all glued up if they’re likely to pop away from their rings) string your ornaments on to the hanger making sure to staggar them so that you get adequate coverage, and try to make string on your colors in an equal pattern so it’s not big clumps of one color. When you’ve gotten them all on, hold the hangar closed and look the wreath over, moving ornaments that need to fill in gaps, and make sure you don’t want anymore on.

Step three: Twist the wire hanger closed and use ribbon wire to tie your bow about the wreath near your hook. Some people cover the hook with ribbon, my bow was big enough that fluffed the right way, you don’t notice the hook.

And Voilla! You’ve got yourself a pretty nifty holiday decoration.


Mine cost just over $24 each to make, but if you have ornaments already, and ribbon and wire hangers… recycling can make this a really inexpensive solution.